Terrain: Terrestrial Worlds
This is the second in a series of articles demonstrating techniques I use for creating space terrain. I recommend reading the first article on moons before reading this one. This article covers habitable planets, also known as terrestrial worlds.Estimated time required: 3 hours
Equipment ---
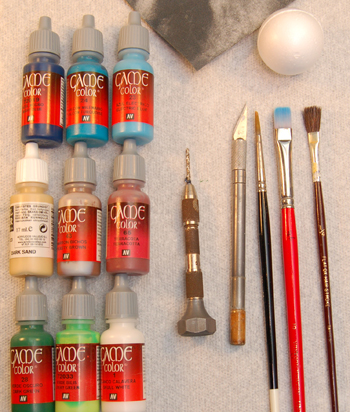
Polystyrene Ball - In this article I'll be using a 1 1/2" diameter ball but depending on your setting a larger ball might be more appropriate.
Flying Base (not pictured) - For mounting the finished planet.
Paint - Any kind will do, in this article I'll be using various Vallejo paints. As for colors, I used:
Paint Brushes - Similar to the first article; a smaller detail brush, and two larger brushes, one that can provide smooth coverage, and one that is old and not cared about for doing stippling.
X-acto Knife - As mentioned in the previous article, trimming expanded polystyrene can be disastrous without a very sharp blade so before you start, put in a new one.
Sandpaper - 240 grit worked well for this article.
Pin Vice - As before, this will be used as a holding tool so make sure it is fitted with a drill bit that can withstand some pressure (1/16" or 1/8" is recommended).
Step 1 --- Cleaning the mould lines
The initial steps are the same as in the first article. However, after doing the trimming with the x-acto, I decided to do a little bit of sanding to smooth out those areas. As I've never bothered to do this step before now, I was surprised it not only smoothed out the areas but it also virtually eliminated the visible cell pattern that some people had issues with from the first article.
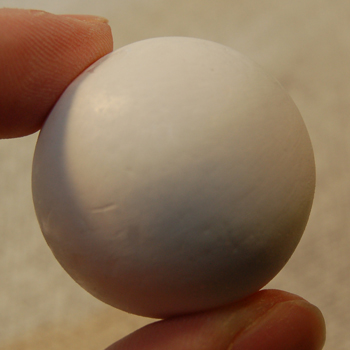
Some of the responses suggested using white glue or other methods to fill in the gaps, but just regular sanding gave me excellent results. Since any sort of cell pattern would be more obvious with this paint scheme, it's a good idea to minimize it if at all possible, and this is a fast and easy method.
Insert the pin vice as if it were a cork screw into the bottom of the ball.
Step 2 --- Painting The Water
I approached painting this planet based on altitude; I started low and worked my way up, so the water would be the first thing I'd paint.
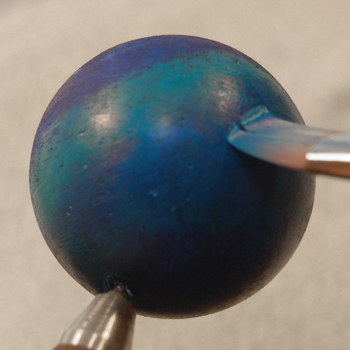
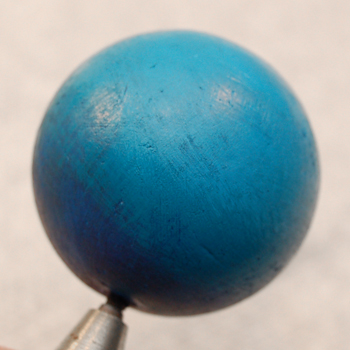
Since I'm making this a very Earth-like world, it is going to be largely covered in water. I first paint the whole ball Night Blue. I'm not overly concerned with smooth coverage since a little bit of variation will only help to enhance the appearance as planets are not smoothly colored.
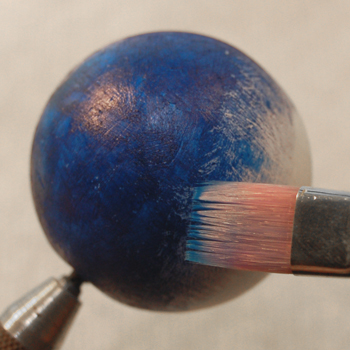
Unlike the first article where I painted the moon as if it were lit from above, in this one I shifted the imaginary light about 45 degrees. I'm not painting a true dark side/light side, merely tweaking the paintjob to give the impression of light coming from a direction. Where this is mostly going to show up is in the water.
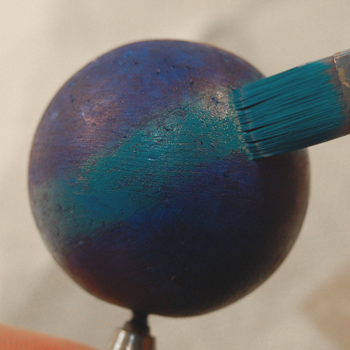
The intended transition goes from dark blue -> Turquoise -> light blue. So with the ball painted dark blue, I start by painting a stripe of turquoise around the ball (at an angle since the light is at an angle).
I then blend this stripe witht he lower half of the ball and completely cover the upper half.
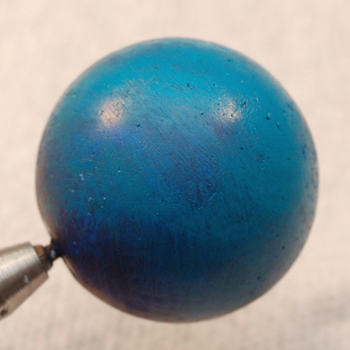
There's no special technique I'm using to blend the colors. Just don't have a lot of paint on the brush and the difficulty of covering up a dark surface with a lighter color works to your advantage. No need to be careful with it either, variation is a good thing.
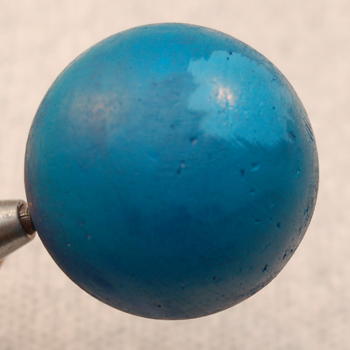
I then select my "hot spot" in the center of the turqoise layer and paint it light blue. Then just blend it with the turquoise layer and you will end up with a blue ball that has a nice transition in colors.
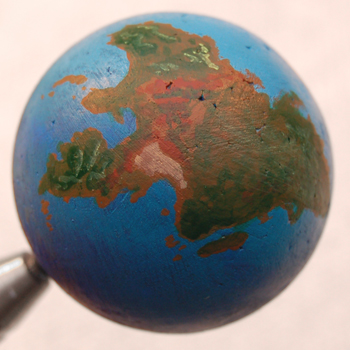
Step 3 --- Block In The Land Masses
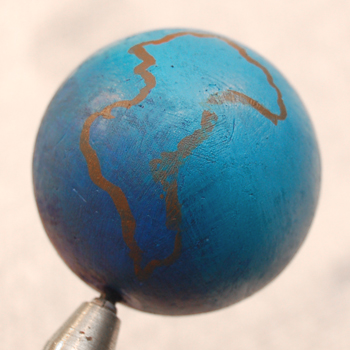
Moving on to the landmasses: take some brown paint and make some squiggly blobby shapes. I like to draw an outline and fill it in but it doesn't matter how it's done. The important thing is to make sure there are nooks and crannies in the overall shape.
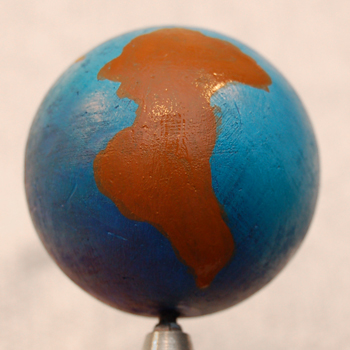
When you're done, you'll have what looks like simple and somewhat cartoony land masses.
Step 4 --- Define The Land Masses
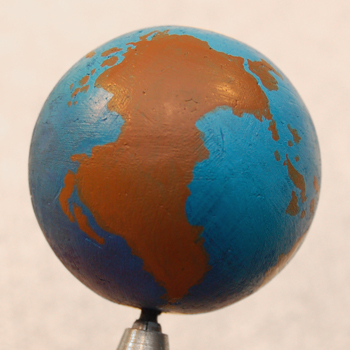
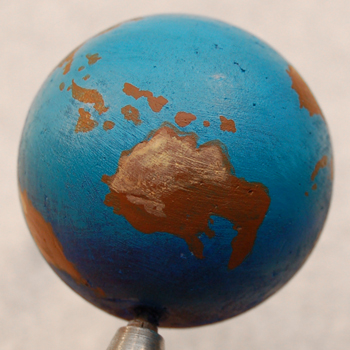
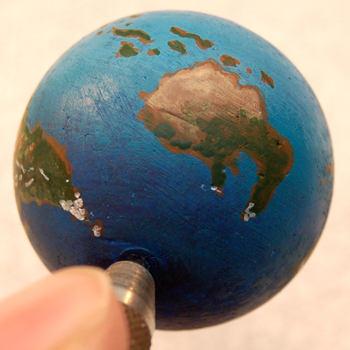
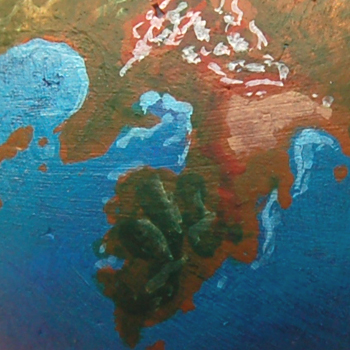
Time to add the details. Still using brown paint and using your detail brush, go along the edges of the land masses and add high frequency details. It's also good at this point to add islands and peninsulas.
I like to add some islands where a land mass has a lot of nooks and crannies, as in the upper-left in the above picture, and if there's a part of land that juts out or comes to a point, I build an island chain off of it as seen in the upper-right. I then balance those details with peninsulas in the other regions as seen in the lower-left.
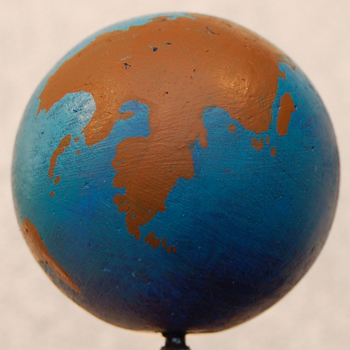
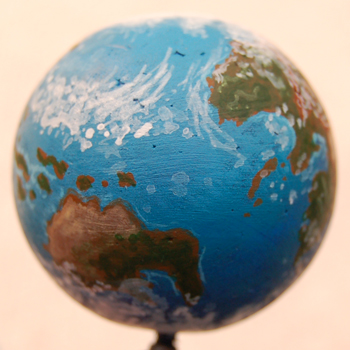
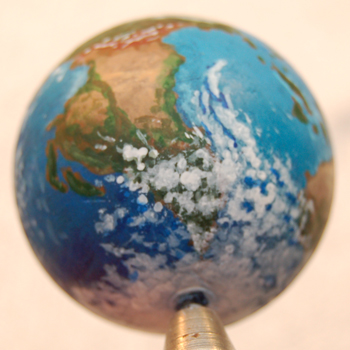
I think a good terrestrial world should have at least three major land masses and that's what I've done here. In this case, I subconsciously made them vaguely earth-like with a North/South America-like continent, a Europe/Asia-like continent, and an Australia/south pacific-like region.
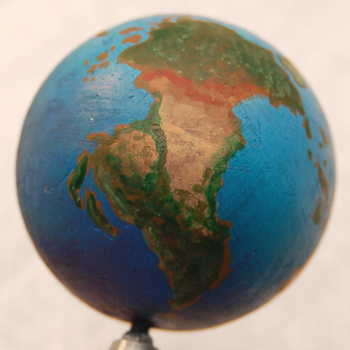
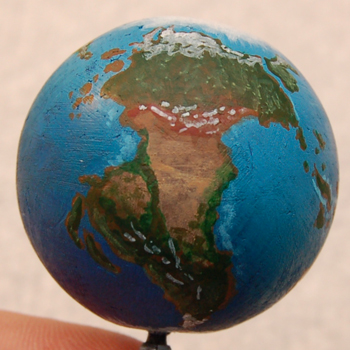
Step 5 --- Detailing The Land Masses
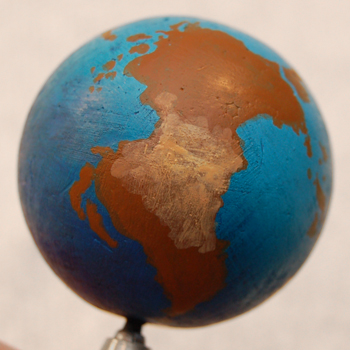
Still working my way up the altitudes, I first start with the desert regions. Assuming that the equator is around the middle of the ball, I start dropping in some sandy areas near the equator on every land mass.
I try to always leave a little bit of along the outer edges of the continents.
Once again, I'm not overly concerned with coverage. Variation helps the look, and so much of making a good looking planet relies on impressionistic details. Just dabble the paintbrush and stay within the lines of the land masses.
I then move on to adding reddish dirt regions as a border to the sandy regions, as well as block in the forest areas. This helps define where the mountains will be. Keep in mind that mountains tend to carve a swath through landmasses and/or follow coastlines.
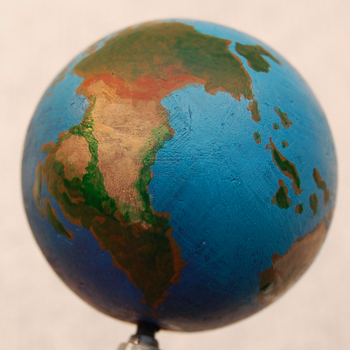
For the forested areas, I start with dark green and then add some light green to it to vary the color a bit. I also tend to use light green where a river might be or in more tropical regions.
Step 6 --- Adding Snow

Lastly, I add some snow caps to the imaginary mountains and in regions near the poles using white paint. Just dabble it on and don't worry about coverage.
This is more about maintaining logic than it is about being artistic. When we get to painting the cloud cover, much of this step isn't going to matter except as a safeguard ensuring that what you see through the clouds make sense.
At this point I also add white caps to the poles. In this case I blot some white paint down and let that define the shape, and then fill it in. I left the edges rough because I knew it would blend with the clouds later on.
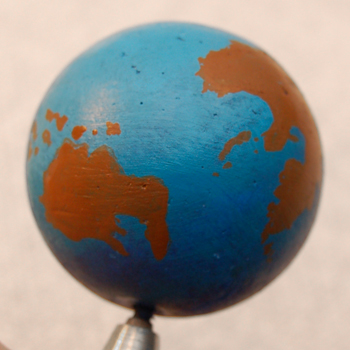
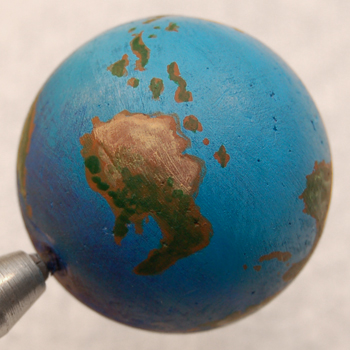
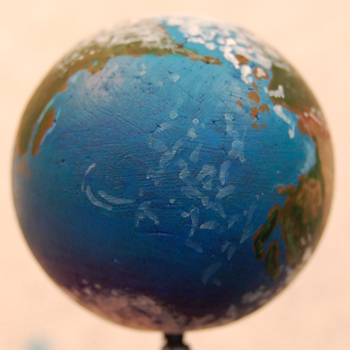
Step 7 --- Adding shallow water
This step is out of order because I didn't think about it earlier, but realized it was missing as I was inspecting my progress.
In the tropical regions, take some light blue paint and create shallow water around the islands and along the coasts of land masses. Treat them as accents and don't be heavy handed. Just paint some lines following the edge of the land and do some blending if necessary - most of what I did is not blended.
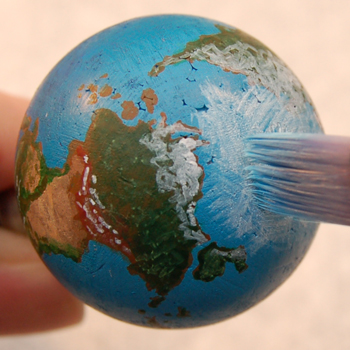
Step 8 --- Clouds
A planet without clouds is like a face without an expression. Clouds are what gives a planet character and life because they are dynamic and always in motion. Painted clouds should convey this idea.
This is the most terrifying step. You have a pretty decent looking planet at this point and you're about to go on top of your paintjob with white paint. If you approach it the right way, there is very little risk and a heck of a lot of reward. Remember what I said before when painting the water, it is more difficult to cover dark colors with light colors and you use that to your advantage.
There's two ways I approached starting clouds, but both used the same techiques to finish them. The first method was to lightly blot the surface with my ratty brush giving me speckled region. That gave me a starting shape to work with.
I then took my detail brush and built it up thicker toward the center and tried to give some of the outlying blotches a little more body. I'm keeping the paint thin so that I have more control.
The technique here is to build up the clouds layer upon layer so that when you get to the point of making them opaque, you know exactly what you're doing and all your steps leading up to that point gives you a lot of richness in detail.
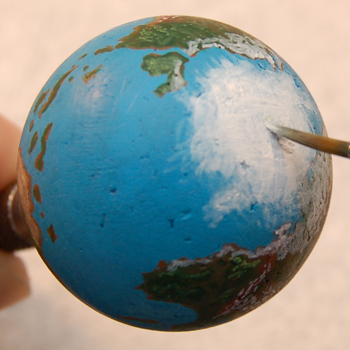
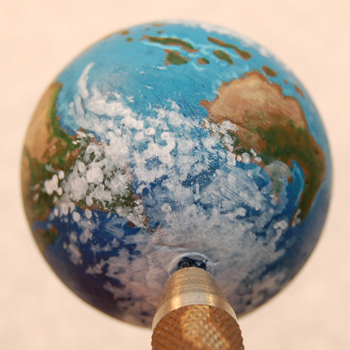
The second technique, once again using watered down white paint, I just start dabbling. As can be seen here, I'm just dabbing small dots, streaks, and blotches in the area where I want some clouds.
In a lot of ways, making clouds is a lot like making continents. You're creating cloudy masses that have a shape to them. The difference is you're not filling in the shape with solid color but rather random blotches.
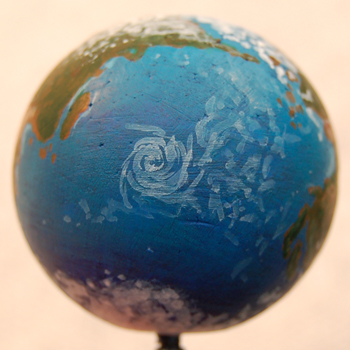
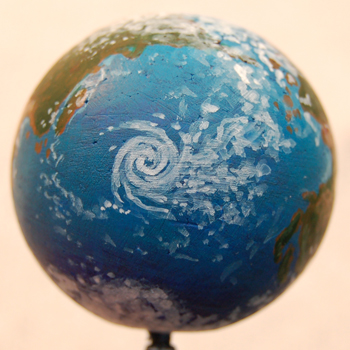
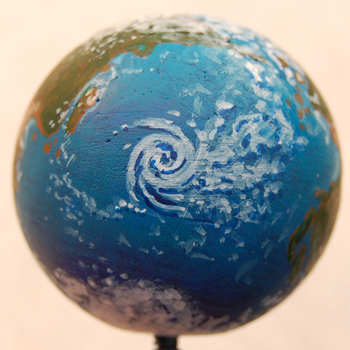
As I work on this cloud formation some more, I've decided to stick in a hurricane off to one side of it as well. I just keep dabbling and gradually use thicker and thicker paint. I let areas build up heavier and make those more opaque, and refine the details. Mostly, it's just stippling with the brush.
Toward the edges of the cloud system the blotches become less dense and so I start turning those areas into small individual clouds. If I see a faint blotch, I'll put a more opaque dot inside it.
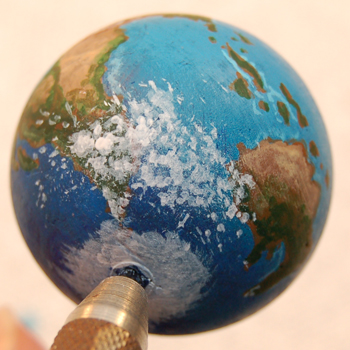
Gradually, the cloud cover takes shape. In the main example I have a hurricane but on other clouds, I like to add some streaky clouds to give them more dynamic motion - usually near land to give the impression of wind currents.
Step 9 --- Adding Depth
Similar to the craters in the first article, adding depth to the clouds use the same sort of principle. Over the water I paint shadows along the bottom edges of the clouds, using dark blue paint when over water, dark green (darkened with a little bit of black) over forested areas, etc.
This will make the clouds pop out from the surface and give them some dimensionality. This should not be heavy handed.
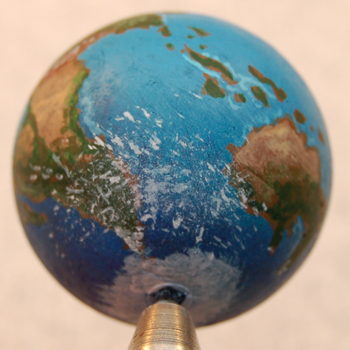
Finishing ---
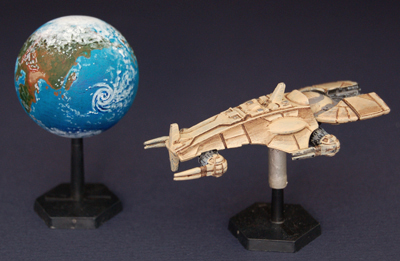
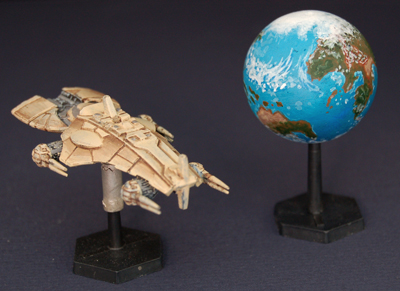
One terrestrial planet ready for play! Take out the pin vice, widen the hole a little bit with the end of a paintbrush and stick the planet onto the flight stand.
©2008 Ninja Magic LLC